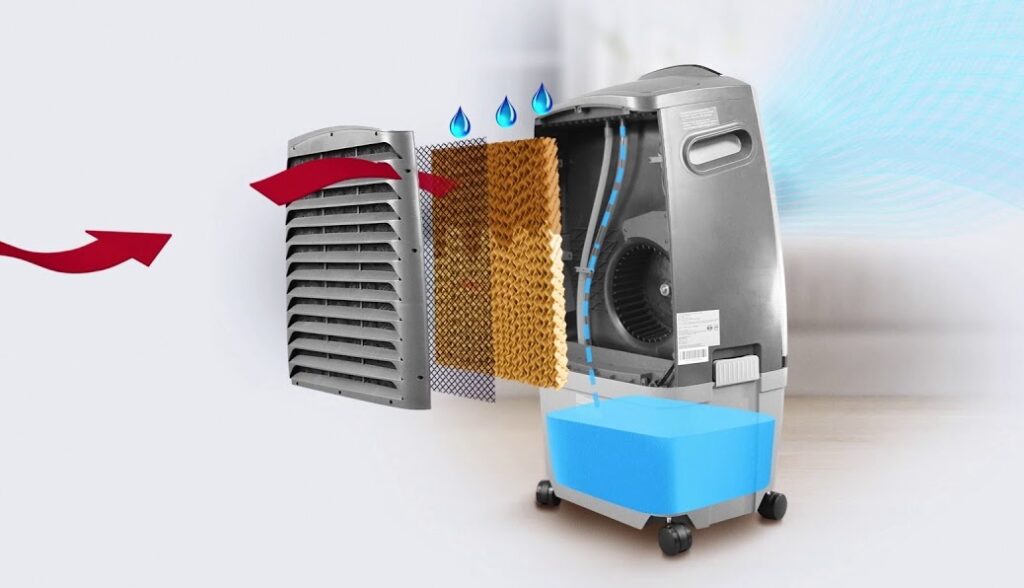

Bathroom fans are important for removing humidity and bad odors from the private bathroom and preventing mold and mildew from building up. Removing the humidity will also prevent wallpaper or wall paint from peeling off, or doors and windows from warping. Fortunately, the task of venting bathroom fan into attic is a relatively simple do-it-yourself project for homeowners with a basic knowledge of electricity and manual skills.
Bathroom fans should be vented to the outdoors. Ventilating this fan in the attic is just asking for problems. Excessive humidity will cause condensation on the roof elements, insulation, and eventually mold growth. Meanwhile, to vent a bathroom fan into the attic, you should know that you don’t necessarily need access to the attic, according to the House Weather.
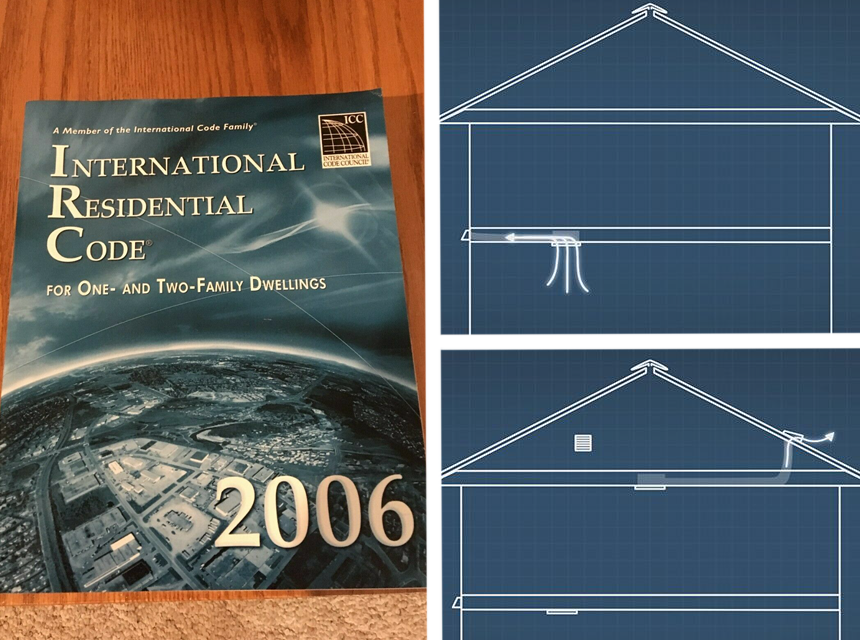
According to the 2006 International Residential Code Trusted Source www.epa.gov , you’re required to have your bathroom fan vents going to the exterior. The code requires that the air removed by mechanical exhaust HVAC systems must be vented to the outdoors. Air must not be exhausted into your attic, crawl space, ridge vent, or soffit.
There is a bit of planning and preparation that you must take into account and execute.
First, you have to determine the right cubic feet per hour for the bathroom so that you will buy the fan of the correct size. Cubic feet per hour (cu ft³/hr) refers to the amount of air that the fan can move per hour. The minute calculation is called CFM (cubic feet per minute). Small washrooms need little CFM, while larger ones need a lot more power.
To determine the correct cu ft³/hr for your bathroom, multiply the area of the room by the height (i.e. length x width x height); and then by 1.1. If your bathroom is 10 square meters and is 2.4 m high, the cu ft³/hr is 26.4 m³ / hr. As for the CFM calculation, if the bathroom is 120 sq. ft. Multiply that by the bathroom height and multiply the answer by 7.5 and you will get a CFM of 128.
In any case, you can find the CFM information on the packaging of the fan.
Note that bathroom fans can make between 1 to 4 sones of noise. So you should keep the noise in mind when purchasing. New fans usually have a noise level fewer than 1 sones (quiet) to over 4 sones (loud). Some people prefer very quiet fans, while others prefer flashy fans for public areas. As with the CFM, the noise level is often indicated on the packaging.
The position is particularly important in the bathroom. It should be installed centrally between the shower and toilet and ensure optimal air exchange. If your bathroom is very large, you may need multiple fans.
If you are installing a new fan, you will need a plan of your attic/ceiling. Finally, the main part of the fan will be mounted there. It should be mounted between two beams/girders where no pipes or other obstacles are.
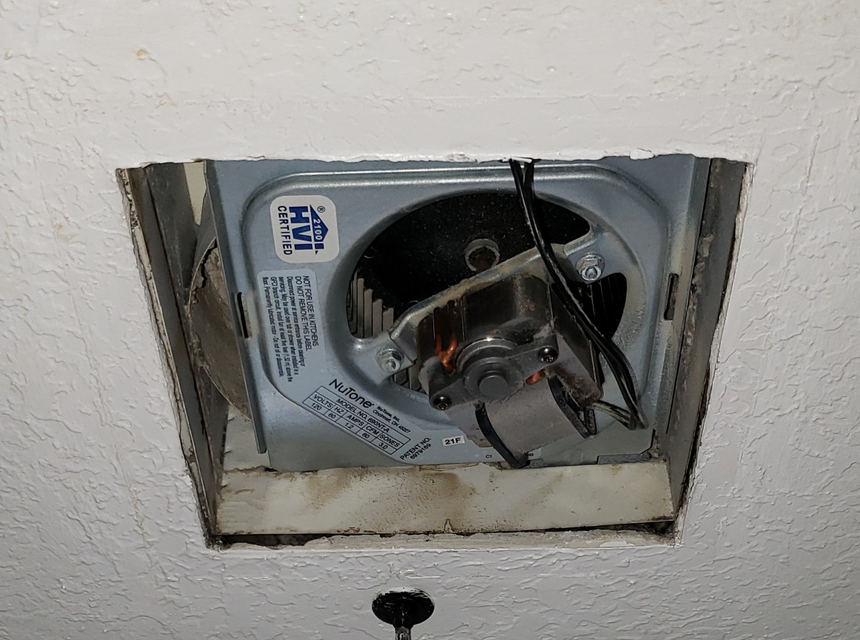
When replacing an older fan, the easiest thing to do is to clip the new one in the exact same location unless there is a good reason to change it.
Installing the exhaust fan is enough to remove humidity from the bathroom. Make sure you vent the exhaust fan to the outdoors and the fan is turned on while bathing. This way, the excessive humidity will be vented outside.
To vent a bathroom fan Trusted Source 3 Ways to Install a Bathroom Fan - wikiHow Bathroom fans are essential for removing moisture and bad odors from the bathrooms in your home, thus preventing the growth of mold and mildew. By removing excess moisture from the air, you can also prevent wallpaper and paint from peeling… www.wikihow.com into the attic according to the code and without any negative consequences to your home and those inhabiting the home, check out our step-by-step instructions.
Installing a fan is a do-it-yourself project for homeowners with some basic skills. Before you get started, think about what you will need and put everything within reach.
Of course you need a bathroom exhaust fan. However, if you’re not a professional, you should choose one that can be easily installed by a DIYer. In this case, one of the most recommended by handymen is the Builder’s Best 084635. This galvanized steel fan comes with predrilled holes and the brand recommends it for do-it-yourselfers and re-modeling jobs.
When it comes to tools, you will need the following simple things like:
Materials required are:
If you want to lay the duct out through the roof, you will also need:
Safety items you’ll need:
 A sturdy stepladder to reach the fan from below
Take your drill and an extra-long drill with a ¾ inch diameter (that’s around 2 cm) and drill a hole in the ceiling where you want to attach the fan. Also, measure the housing of the fan.
Go up into the attic, find the reference hole, and remove the insulation around it. Use the dimensions of the housing to make sure it fits in the chosen location between two supports.
Go back to the bathroom and measure the intake part of the fan. You need this size to ideally determine the thickness of the holes in the ceiling.
Use a square frame and a pencil to mark the outline of the fan inlet on the ceiling.
Use your jigsaw to cut the sketched hole in the ceiling. If you don’t have a jigsaw, you can use a drywall saw. Do not let the cut-out parts of the blanket fall to the floor. You could detach other parts of the ceiling.
Use your free hand to carefully loosen the rectangular piece of blanket and place it on the floor.
Please don’t forget to put on your safety glasses and wear the breathing mask while you drill and saw to protect your eyes and lungs.
Before you slide the fan into the hole, secure a 90-degree elbow piece (which you will later attach the vent pipe to) with sealing tape.
Slide the cable connector through the removable cover of the hole on the side of the fan housing and slide the metal bracket clips into place.
Center the fan in the ceiling hole and adjust it so that it is correctly oriented.
Once it is properly aligned, spread the metal brackets until they have found a grip on the right and left. Use drywall screws to securely attach the brackets to the ceiling joists.
The fan is now securely attached. Now take the cable duct and attach it to the 90-degree elbow again with your sealing tape or adhesive tape.
Now is a good time to supply power by sliding the cable through the fan housing. Secure it with the fixing screw on the connector. Meanwhile, if you purchased a fan with light, you will need a 3-wire cable.
By the way, exhaust fans and lights are very functional, saving the attic space. One of the most purchased for household ventilation online is the Broan-NuTone 678. The exhaust ventilation fan is also integrated with light and can be used in the bathroom and home.
So the next step is to find the shortest, straightest path from the fan to the outside. The longer the pipe, the less effective your ventilation will be.
You can run the exhaust pipe through the side wall or the roof, whichever is easier. Just make sure it is as straight and short as possible.
Attaching the vent cap will be dependent on the weather, depending on whether it is mounted on the roof or on a side wall.
If your point of exit is on a side wall, take a point between two wall supports and look for reference points on the inside so that you can find the same points on the outside. Then you take a 4-inch (that’s about 10 cm) hole saw and saw the hole into the wall from the outside and bring the chimney into position.
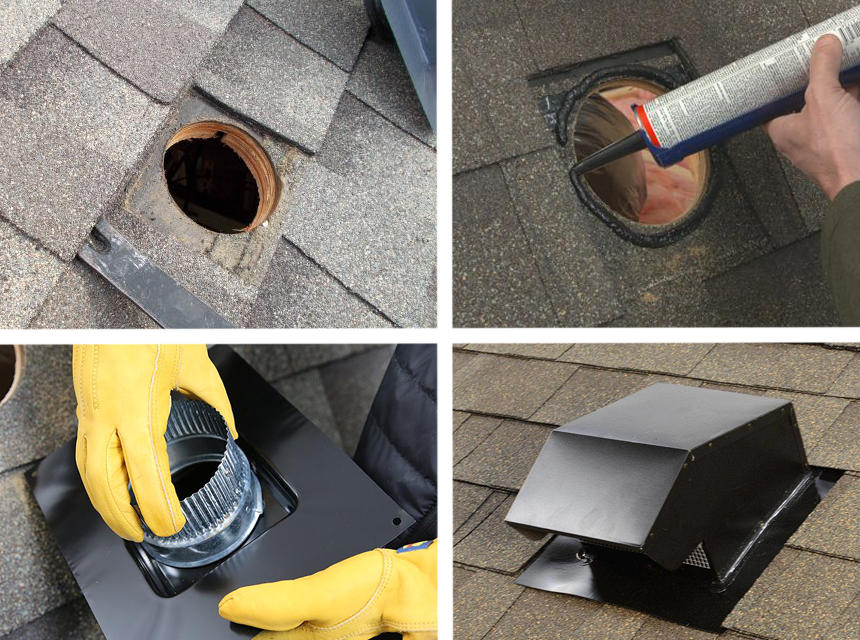
With your exit on the roof, mark the circle from the inside and cut out the hole with a drywall saw. Go up on the roof (taking all safety precautions) and remove the shingles covering the hole. Install the chimney and fix it in place with roof cement and roofing nails, replacing any loose shingles.
Go back to the attic and use your tape to secure the other end of the exhaust hose to the trigger.
Depending on the type of fan, you will need to make the connections either in the attic or in the bathroom. Follow the manufacturer’s instructions and double-check that you have turned off the power before proceeding.
Open the housing and pull the cables out of the connection point. Strip about 1 cm from each wire.
Connect two wires of the same color (usually white to white, and black or red to black). Wrap the stripped copper cable around the green grounding clip or screw it tight.
Push the cables back into the connection unit and close it again.
If you feel unsure about making electrical connections, don’t be afraid to seek professional help to install the fan or to inspect it when you are done with the installation.
Take care when handling aluminum cables. Only professionals should handle these cables!
Now you are as good as done. Insert the plug of the motor into the socket and fasten it with the screws provided.
Attach the decorative plastic grille by pushing the fastening screws into the eyelets provided on the housing. Make sure that the grille rests firmly on the ceiling – if necessary, spread the mounting wires a little to create more tension. Test the new fan by pressing the power button.
Installing a ceiling exhaust fan into the attic is something you can do by yourself but you have a lot to consider. Before you purchase, you have to calculate the fan’s CFM rating and know the sound rating you want. You also need a few basic, necessary, and safety items such as screwdrivers, combination pliers, drill and jigsaw, a flexible conduit, valve cap, screws, joint seals and nuts; ceiling cement, shingles and roofing nails; safety goggles, breathing protection, brackets and safety harness.
While venting bathroom fan into attic, it is important that the exhaust air is led outside. If you lead this into the attic, it will force the formation of mold.