
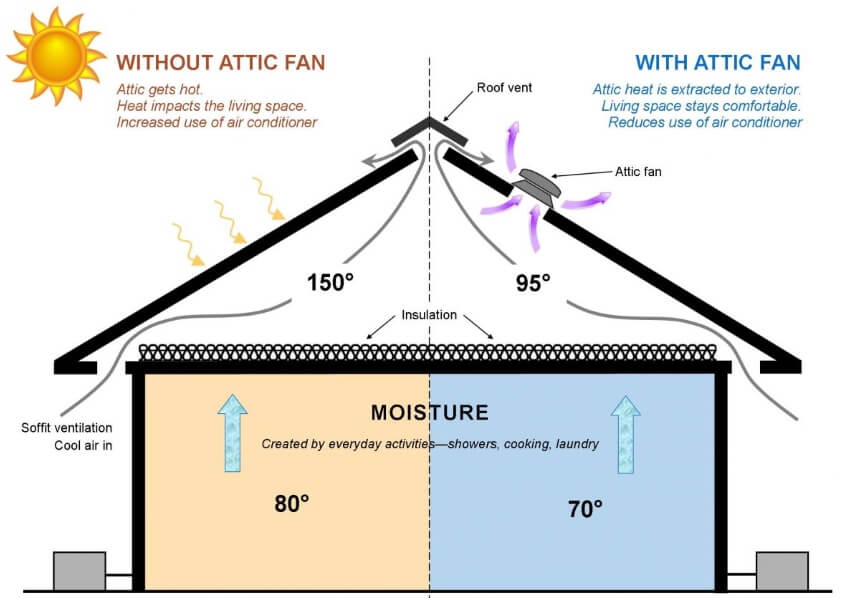
Though you may not spend a lot of time in your attic, adding some ventilation Trusted Source Dealing with damp | Life and style | The Guardian Bridget Bodoano explains how to identify and tame the silent demon. www.theguardian.com in this area of your home is something you should consider. Doing so can keep the temperature of your attic low, which can keep the rest of your home cooler as well, which is a must for those hot, humid months of the year. Learning how to install an attic fan can make your home more comfortable and reduce your energy costs at the same time.
You may want to start by comparing whole house fans vs attic fans since these are not the same thing. Whole house fans can help cool down your entire home and are best for cooler climates, while attic fans focus mainly on this area of the house and are designed for hot summer months while dehumidifying in the winter. For this article, we’re going to focus on attic fan installation.
 Installing an attic fan is easier than you may think. Though there are several steps to the process, the main steps involve cutting a hole in your roof, securing the fan in place, and wiring it to a power source. This is a job you can likely do on your own or with an extra person to help, without needing any special skills to complete your project.
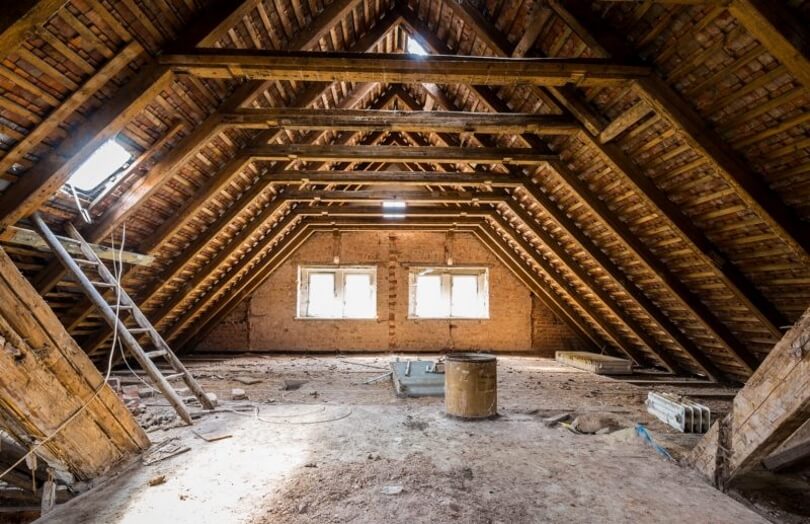
You should also check your attic for passive venting to be sure that your fan will work properly without sucking the air-conditioned interior air from the rest of your home. A lack of insulation will reduce the attic fan’s effectiveness, so you may want to look at the attic’s insulation as well. It should be at least a foot thick for the best results after your attic fan is installed.
 Now that you’ve decided to install an attic fan, you should first choose the tools and materials you need for this project. Gathering them before you start the installation can help speed up the process since you won’t have to stop in the middle of a step to find a missing piece or run to the store to buy something you’ve forgotten.
The most important item on this list is the attic fan itself. There are many different types of attic fans to choose from, so you can buy the perfect one to install on the roof of your home. There are also wall fans that you can use, depending on the layout of the attic. A popular choice is the AC Infinity Airlift S12, which includes 8 speeds, a powerful EC motor, and a backup memory, plus all the parts and screws needed to mount it.
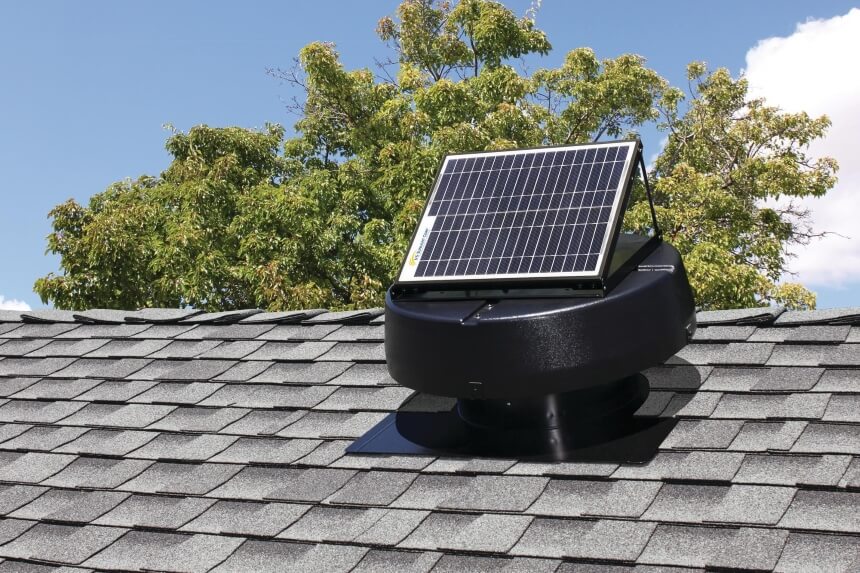
There are also some quality solar attic fans to choose from that can save you money on your electric bill while still keeping your attic and home at a comfortable temperature. The Solar Attic Fan from Natural Light is easy to install since it requires no wiring done, plus it comes with all the hardware needed to set it up.
As well as the attic fan, you’ll also need a few other items. These include:
 Once you’ve gathered all the tools and materials that you need to install your attic fan, it’s time to get started with the installation. First, you need to choose the right place for your fan. The best place for this is about 2 feet below the roof’s ridge. You should also look for a spot that is as close to the roof’s middle as possible in the horizontal plane.
If your fan is placed closer to one side or a gable, this will cause the ventilation to favor one side of the attic over the other for uneven cooling.
You should also try to keep the fan away from passive vents to avoid sucking in the air from this vent since this will interfere with how the hot air is removed from the attic.
To make sure that you’re installing the attic fan in the proper place on the roof, use a measuring tape to find the exact center between the rafters of your chosen area. After marking the center spot, use your drill to insert a screw on this spot, making sure it goes right through the sheathing and the shingles so the tip of it can be seen from outside the house. Once your screw is in place, head outside, climb onto your roof, and find the screw sticking out of the shingles.
When you’ve located the screw, it is time to pencil in the outline of the fan. Many of the attic fan models on the market include a paper template that will show you the dimensions of the fan for the right size when cutting your hole. If the fan you’ve purchased doesn’t include one of these templates, you can create one using a piece of cardboard, outlining the shape of the fan onto it to use on your roof.
Place your template on the roof so that the center of it is located over the screw you inserted into the roof. Use your pencil to mark the template onto the shingles, creating the perfect outline for your attic fan.
After you’ve marked the outline, use your drill to create a starter hole in your roof using a half-inch wood bore bit. This will make it easy to insert your reciprocating saw to cut your hole. You should also put on some goggles to protect your eyes from wood chips or other debris that could fly up as you cut.
Insert the blade of your reciprocating saw into the drilled starter hole and begin cutting, following the outline that you drew on earlier. Be extra careful to avoid any rafters or trusses since cutting through these could cause some structural damage that you will then need to repair before you can finish the attic fan installation.
When you near the end of the outline with the saw, grab the screw you inserted earlier to prevent the cut piece from falling into your attic.
Dropping it could damage the drywall of your ceiling, so it is best to hold it as you cut and pull the cut piece up and onto the roof as the cut is finished.
Before you can begin the process of dry fitting your new attic fan, you need to open up the shingles that are located around the hole to prepare this area for the flashing. You can do this using a pry bar or any other flat tool. If there are any nails in this area that will block the flashing, cut them beneath the shingles using your reciprocating saw to prevent them from getting in the way or damaging the flashing when you install it. This will also make it easier to lift the shingles enough to work underneath them.
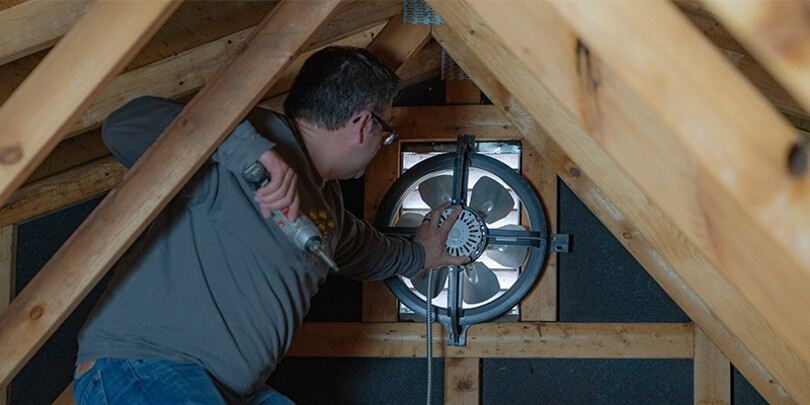 Now that you’ve prepared the area around the hole, you can begin dry fitting the fan. To do this, insert the attic fan you’ve purchased over the hole, lifting the shingles during this process so that they are over the flashing. The attic fan’s bottom flashing should be positioned on top of the shingles around the hole, not beneath it. Once you’ve got the fan dry fitted to your liking, you can move on to the next step.
Before you begin to fasten the attic fan to your roof, you should apply a decent bead of exterior caulking to the bottom of the fan. This will help seal it to keep air from passing around the fan instead of through it as it is supposed to. If you don’t have decent access to your attic, you may want to attach the included thermostat or junction box to the rafter next to the fan at this point as well.
Once your attic fan is properly positioned and you’re caulking is in place, you can secure the fan to the roof. Use some screws or roofing nails on the attic fan flashing for this process. These fans are relatively light, so you shouldn’t need to use too many to hold the fan in place, though you do need to make sure it won’t come loose.
Be sure to check the weight of the fan you’ve purchased so you know how many you’ll need to use.
After screwing or nailing the attic fan into place, it is time to seal all of the holes to prevent any leakage. Do this by applying your exterior calking to the heads of those nails or screws. You should also add some caulk beneath the shingles over the flashing, though you should avoid the area beneath the bottom flashing since doing so will prevent any water from escaping, which could cause leakage and eventually damage that requires repairs. Once the caulking is applied to your liking, you can take your tools and other materials off of the roof and head back up to your attic.
 Now it’s time to deal with the power source. Many of the attic fans on the market have a simple plug to run power to the unit. If this is the case, plug your fan into the nearest attic outlet and move on to the next step.
If your new attic fan needs to be wired into your home’s power, you should find the instruction manual and locate the wiring diagram to learn how best to do this. Many models are simple to wire by connecting the white to white, black to black, and then grounding the wire to the green screw.
Though this process is relatively easy, even for beginners to this type of project, if you’re not comfortable doing this yourself, you can consult with an electrician to be sure you’re doing this part of the installation correctly. If you have a friend or family member on hand that’s wired a fan of this type, you can also ask them for help to save a bit of money on electrician fees.
Those who have purchased a solar attic fan won’t need to worry about any wiring since the fan will run on solar energy. Some models do include AC power supplies as well, though these are usually optional attachments and aren’t needed unless you want to run the fan during the night or on cloudy days when the solar function isn’t usable.
If you hadn’t mounted the thermostat to one of the attic rafters when you fastened the attic fan into position, you should do so now. Be sure to check that the air opening on your new thermostat isn’t obstructed in any way. This opening is a small hole on the back of the thermostat and covering it will prevent this piece from working as it’s supposed to.
When the thermostat is attached, you can test out your new system. To do this, hold a lamp close to the thermostat so that the heat warms it up. Do not use a flame for this since this could cause a fire in your attic. When the thermostat warms up, the fan should come on. Once you know it is working properly, you can set the thermostat to the temperature you want and leave it to do its job of cooling your attic.
Even if you don’t use your attic for anything it doesn’t mean that this area of your home doesn’t affect the rest of the house. Attic fans can lower the attic temperature, which keeps the rest of your home a bit cooler during those hot summer months, plus it can help lengthen the lifespan of your roof covering.
Of course, you need to learn how to install an attic fan before you can reap the benefits of having one. The installation process does take a bit of time but it is easier than you may think, even if you’ve never tried one of these DIY home projects before now. There are several different types of attic fans to choose from, too, so you can get the exact model you want for the most comfortable results possible.